
Selecting What to Print
First, select the view you want to be on the printed schedule. Choose the date/week you are looking for. If you want a specific practitioner only then select that in the drop down instead of all practitioners.
Week View (All p ractitioners _)
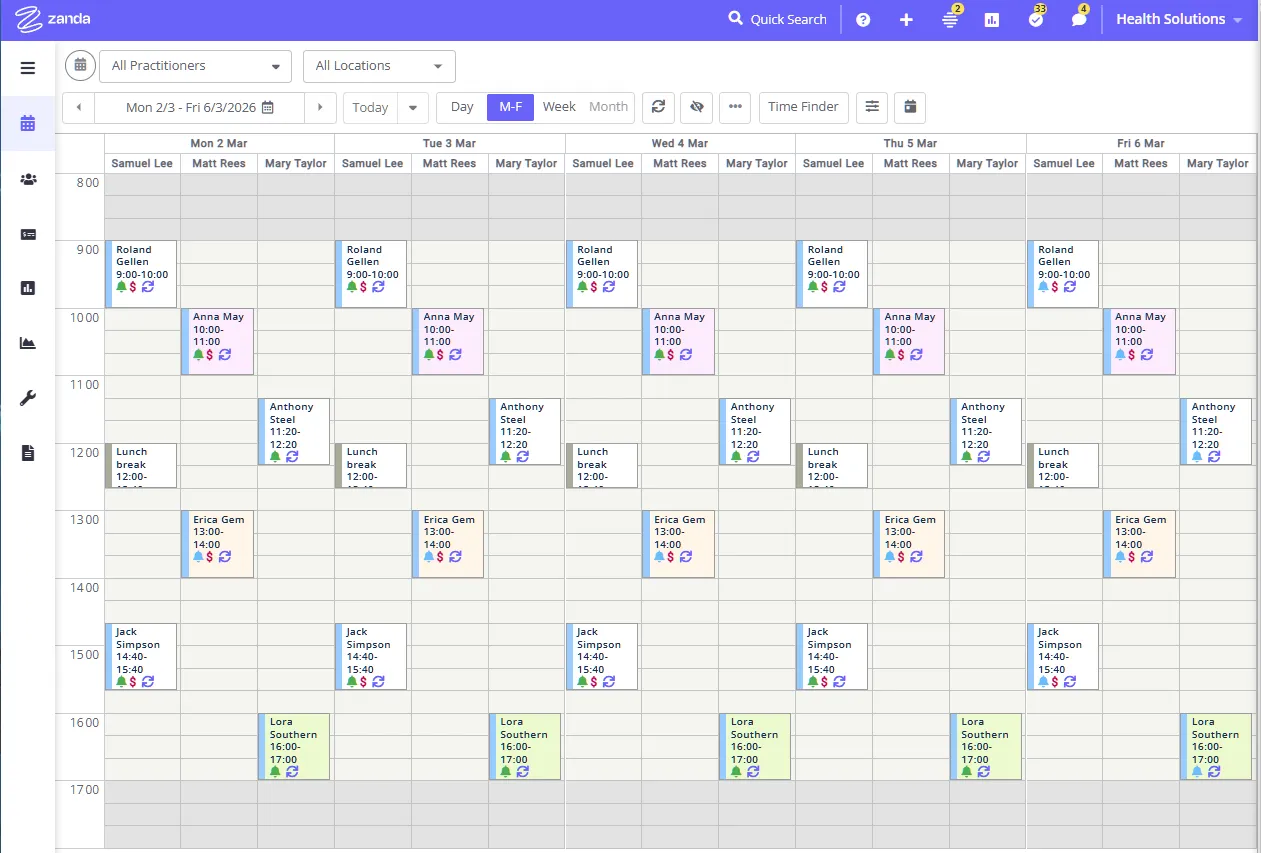
_
Week View (One practitioner _)
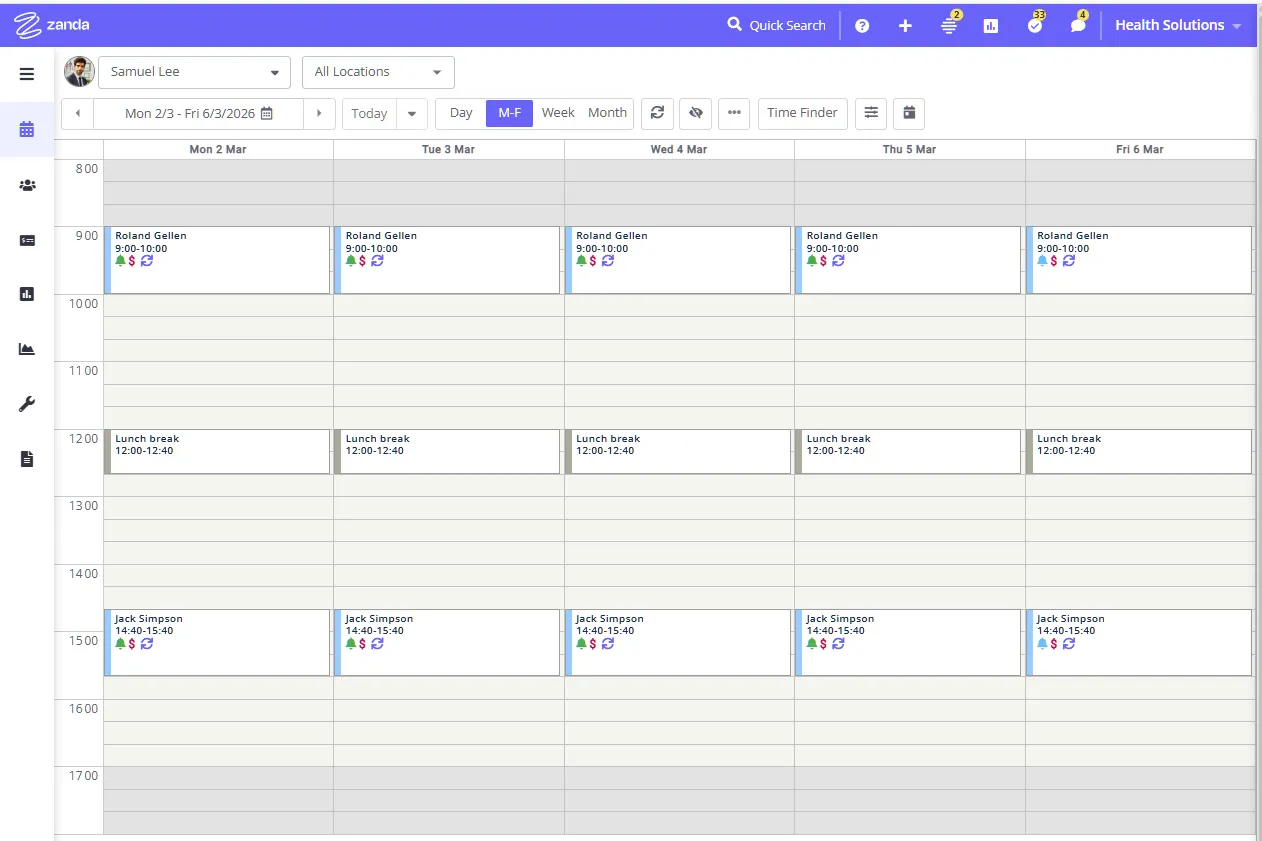
_
_Day View (All practitioners)
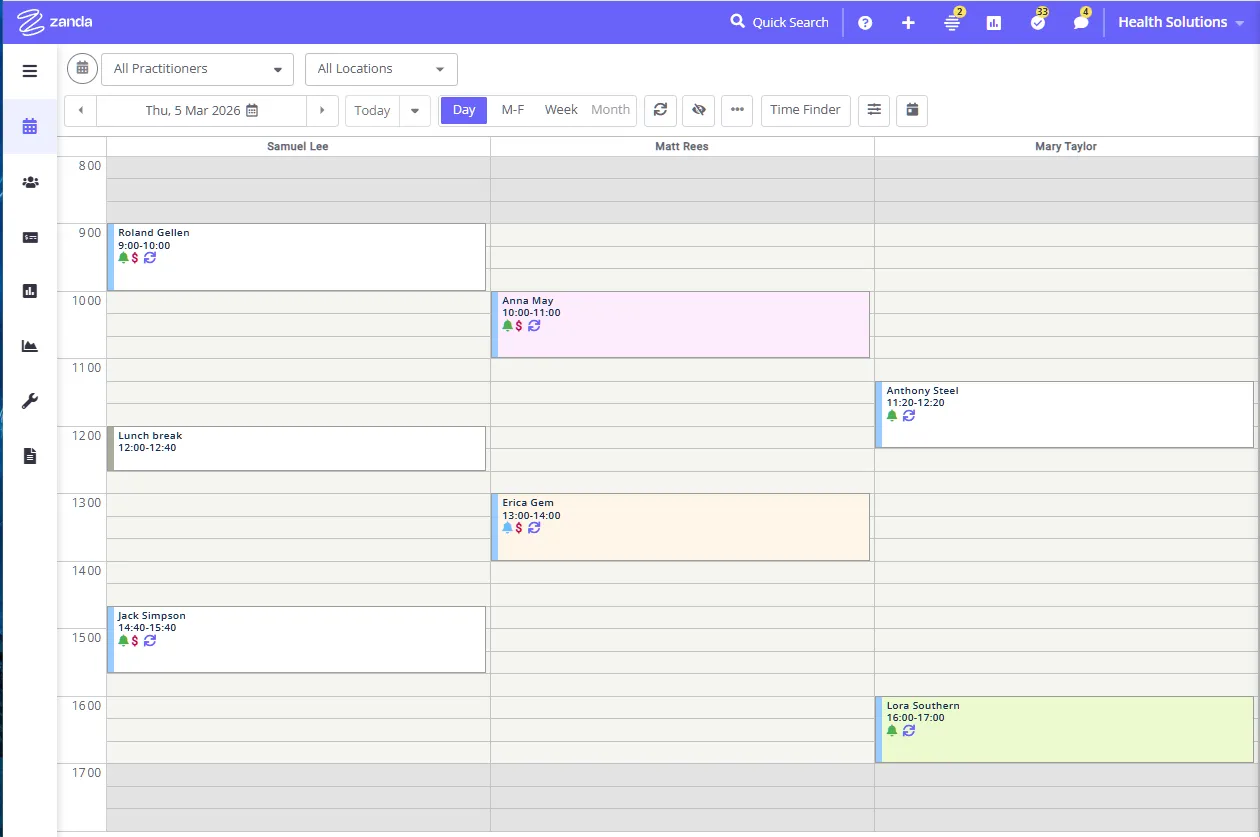
_
Printing the Selected View
- Once you have chosen information displayed that you want to Print, you will want to click the button with the three dots.
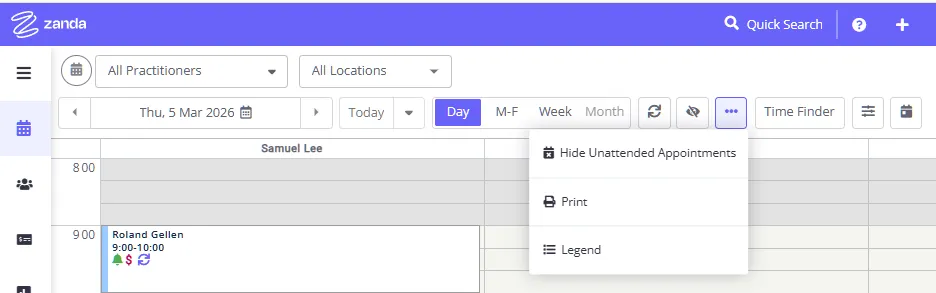
-
This will open a drop down where you can select the option to Print as displayed above.
-
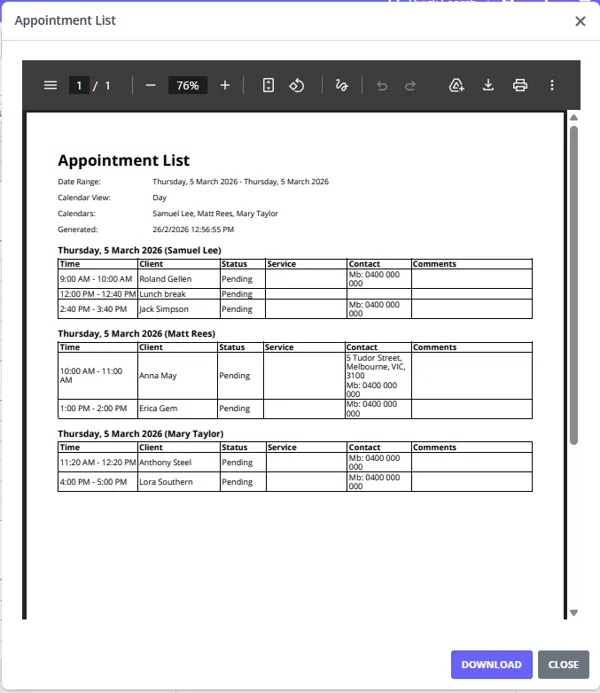
This will then prepare you a document containing the information that you have displayed on that screen. You will have the option to download it as a PDF and then you can print the PDF.
-
The PDF will list the following details for each Appointment:
- Date & Time
- Client
- Status (Pending, Confirmed, Arrived, Completed, Rescheduled, Cancelled, Late Cancel, & No Show)
- Service for that given Appointment
- Contact Information (Address and/or Phone Number)
- Comments (Any Comments that have been entered under the Appointment Details)
Hint 💡 If you want to print out the schedule how it looks in the software you can use the browser printer settings. If your computer has a screen grab feature (like Snip & Sketch), you could also use this to create a screenshot. Then you can save that screenshot, then print it for that view of the schedule.