
Zanda Disclaimer
The Practice Manual contents provided by Zanda have been put together with the intention to help health practices prepare their own operations manual and create their own policies and procedures in an efficient manner. Please keep in mind that the pre-prepared content is general in nature and does not take into account your particular circumstances, including the relevant legal or regulatory authority requirements for your profession or local jurisdiction.
Zanda accepts no responsibility for any errors or omissions included in the content, nor any loss or damage which may arise as a direct, indirect or incidental outcome of the application of any policies or procedures provided as sample content for an operations manual. All policies and procedures should be carefully read and edited or removed to suit your situation. Likewise, we do not make any claims that the content provided is complete in any sense and you should add any additional content that may be required for your circumstances.
To be sure that your Practice Manual covers all the required areas and fulfils all relevant regulations, you may wish to seek advice from the relevant authority bodies and/or seek professional legal advice.
As a Zanda customer, you are entitled to use the Practice Manual content provided including editing and adapting it to suit your needs. However, the content can only be used for the purposes it was intended - as a starting point for policies and procedures for your health practice.
How To Enable Practice Manual
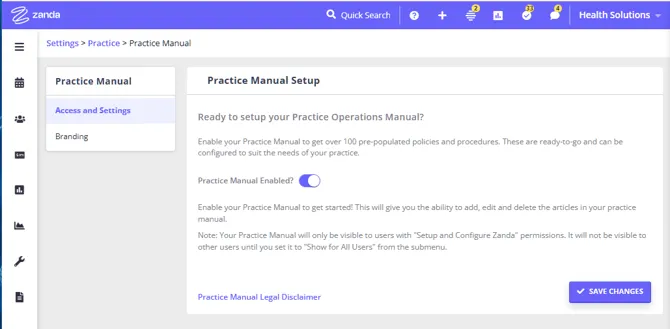
To enable the Practice Manual in your Zanda account, please
- Navigate to User Menu > Account Settings > Practice > Practice Manual;
- Click the Practice Manual Legal Disclaimer, read it carefully and if you agree with everything in it,
- Turn on the Practice Manual Enabled? switch;
- Save the changes.
- You will be redirected to the Practice Manual configuration page, where you can review and modify the available documents to align them with the specific needs of your practice.
Note💡
- Only the account’s Master User (the registered owner), and the users with the permission to Setup and Configure Zanda will have access to enable the Practice Manual in their Zanda account.
- We recommend that you review and edit the Practice Manual sections and articles first before you make them available to all users. Read further to learn more about this process.
How to Add Your Brand Header to Practice Manual
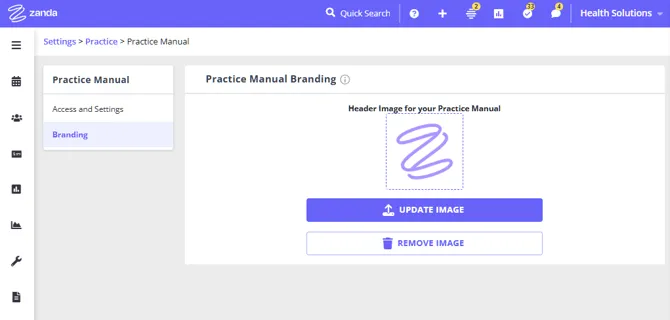
You are able to upload or update your branding header image via User Menu > Account Settings > Practice > Practice Manual > Branding at any time.
How to Update and Customize Your Practice Manual Sections
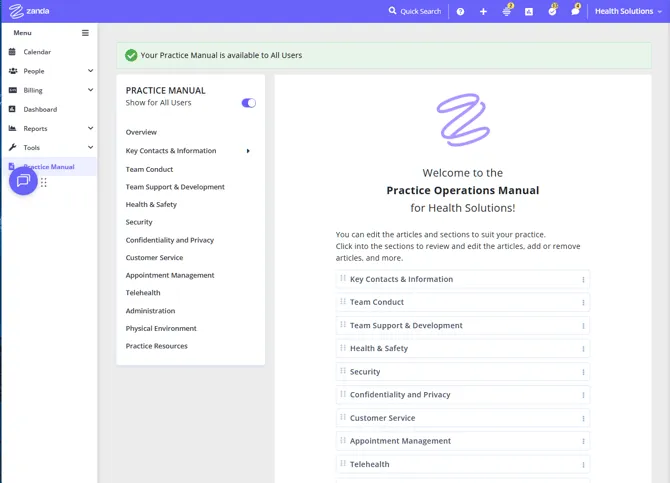
After enabling the Practice Manual, the Master User or any user with permission to Set Up and Configure Zanda can begin updating and personalizing the various sections and articles that compose the manual. Detailed information about managing these articles is provided in the following sections.
This is what you can do:
- View, add, archive, or delete the sections:
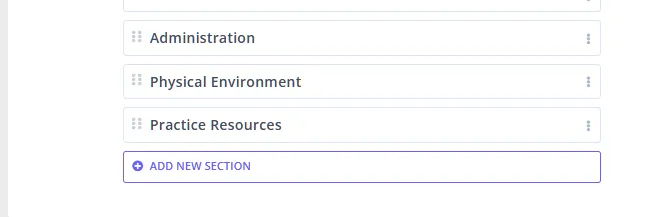
- To add a new section, click on Add New Section under the list of existing sections, on the right-hand side of the Practice Manual page.
- To Archive or Delete the section, click on the three dots next to its name and select the appropriate action:
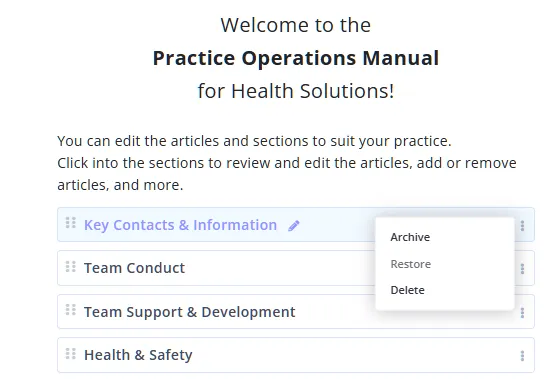
-
Restore the archived sections:
The archived section will be visible to the Master User or the user with access to Setup and Configure Zanda, and they will be able to restore it at any time by clicking on the three dots and selecting Restore: -
Re-order the sections:
Grab the six dots in front of a section name with the cursor and drag it to the desired position on the list. The new order is saved straight away. There is no automatic alphabetical sort, so if you want your sections in A-Z order, drag them into that order. New sections are added to the bottom of the list.
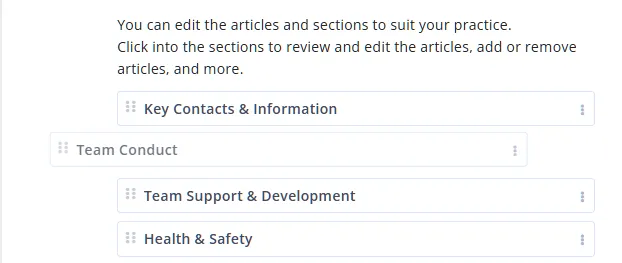
- Edit Section Names easily.
Just hover over the section name and click on the ‘pencil’ icon to edit the name:
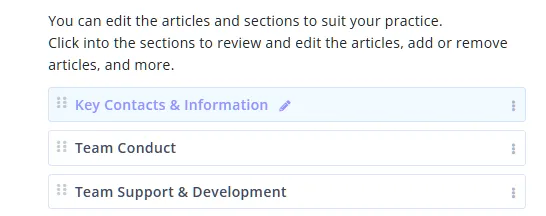
How to Add, Update and Customise Your Practice Manual Articles
Read further to learn about editing and creating articles for your Practice Manual.
- If you click on the little arrow next to the section name in the Overview, you will get a drop-down list of all the articles that have been published in this section. You will be able to click on the article and switch it to the Edit mode from there.
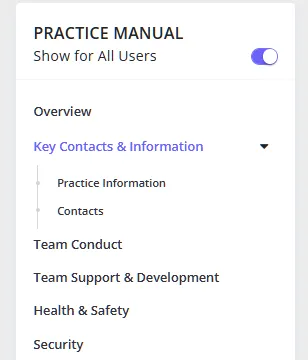
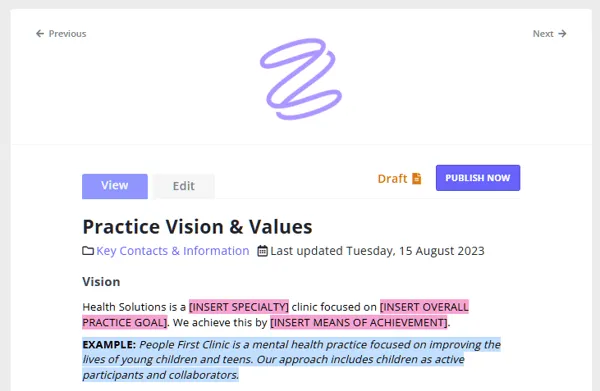
- Use the Previous and Next navigation buttons at the top to conveniently flip through the articles:
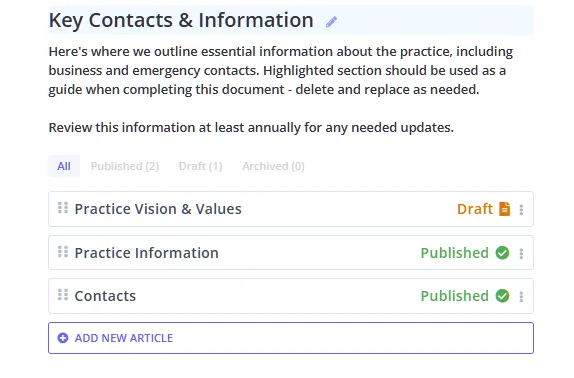
- Another option is to click on the section names on the right-hand side:
-
This will allow you to edit the section title and its summary or instructions that can be added under the title, just hover over them and click on the ‘pencil’ icon;
-
Get the most complete overview of the articles in this section, and perform various actions, including publishing, archiving, restoring, turning back to draft, and deleting an article.
-
You will also be able to relocate an article to another section, just follow the prompts after you’ve hit the Change Section action.
-
Re-order the articles in this section: grab the six dots in front of an article’s name and drag it to the desired position. The new order is saved straight away, and the articles appear in this order in the drop-down list under the section name in the Overview. New articles, and articles moved here from another section, are added to the bottom of the list.
-
Click on Add New Article to start writing one.
When in the article Edit mode,
- Use the Text Editor toolbar for more formatting options.
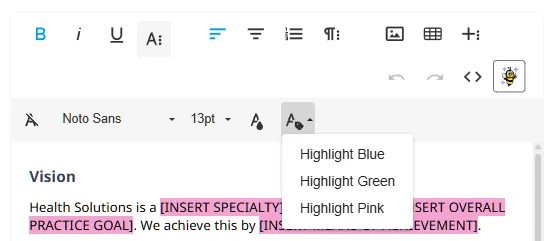
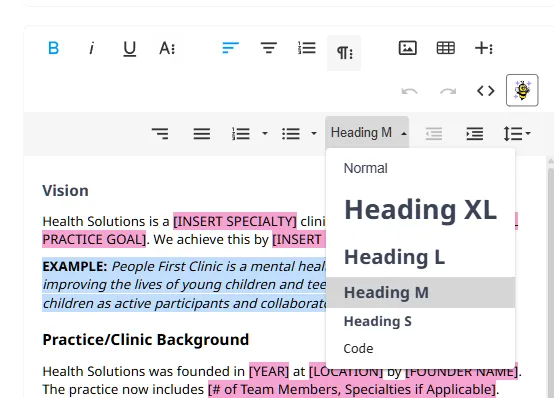
For the Practice Manual, we added the tools for
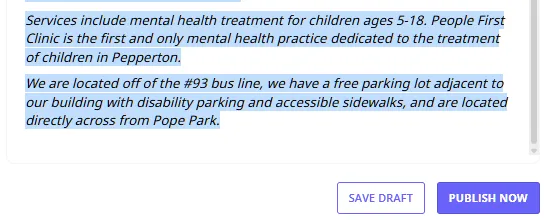
- highlighting the lines of text:
- and selecting more heading styles:
-
Save the article as a Draft, if more work is needed later, or
-
Click on Publish Now when the article is complete.
Using BizzyAI: Write for Practice Manual Content
BizzyAI: Write is an AI-powered writing assistant that can help you draft and refine your practice policies and procedures quickly and professionally. This feature is integrated directly into the Practice Manual editor.
BizzyAI: Write requires the “Enable AI Features” add-on in your account subscription. Navigate to User Menu > Account Settings > Practice > Subscription > Optional Features to enable this feature.
💡 Note: BizzyAI: Write is a free feature and it requires the “Enable AI Features” add-on in your account subscription. Navigate to User Menu > Account Settings > Practice > Subscription > Optional Features . BizzyAI Features to enable it.
How to Use BizzyAI: Write in the Practice Manual
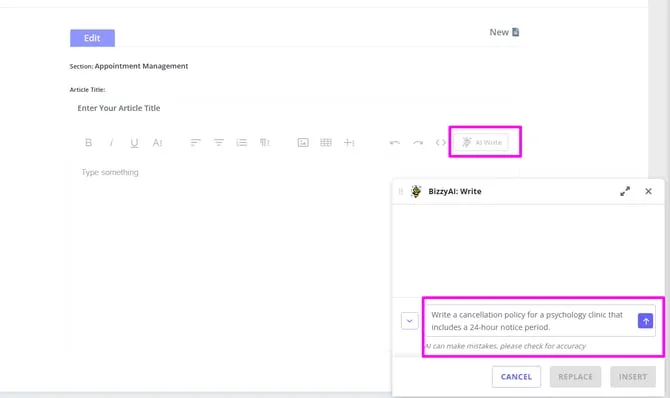
- When editing a Practice Manual article, look for the AI Write button in the editor toolbar.
- Click it to open the BizzyAI: Write assistant.
- To generate new content: Type an instruction like “Write a cancellation policy with a 24-hour notice period” or “Create a confidentiality policy for client records.”
- To refine existing content: Select text in your article, click AI Wirte, and give instructions like “Make this more formal” or “Add a section about late fees.”
- Review the AI-generated content and click Replace or Insert to add it to your article.
💡 Important: Always review and verify AI-generated content for accuracy and compliance with your specific practice requirements and local regulations before publishing.
For detailed information, see Using BizzyAI Write for Practice Manual.
How to Make Practice Manual Available to All Users
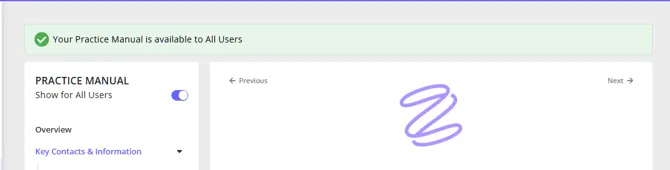
Once all sections and articles are ready and published, turn on the Show For All Users switch at the top-left.
When this switch is turned on, all other users of the account will be able to access the Practice Manual in a read-only mode.
Note💡
- Just to remind you, only the Master User and the users with the access to Setup and Configure Zanda is able to edit Practice Manual.
- Any changes made to it will be recorded in the Tools > Log File.
- Please make sure that each person who has access to your account has a user profile and is logging in under their own details so that the Log File captures their user actions accurately.
Frequently Asked Questions
Can I give an auditor read-only access to the Practice Manual?
You can give an auditor read-only access by turning on Show For All Users, as long as the auditor has their own user profile in your account. This makes the Practice Manual available in read-only mode to all other account users, not only to selected people.
If the auditor needs to update Practice Manual sections or articles, they will need the Setup and Configure Zanda permission. Only the Master User and users with this permission can enable, edit, publish, archive, or delete Practice Manual content.
Can I use the Practice Manual to store reusable forms or other documents for the whole practice?
Yes. You can add a link to a blank form, checklist, or other document in any Practice Manual article. Uploading the file and adding it to the article are two separate steps:
- Open the article in Edit mode.
- In the text editor toolbar, click the + icon, then click Upload Files (the upward arrow icon) and choose your file. This saves the file to your Zanda account, but doesn’t add it to the article yet.
- Click in the article where you want the link to appear. Then click the + icon again and choose Browse (the folder icon).
- In the Manage Files list, click the file’s name. A link to the file is added to the article.
- Click Save to keep the article as a draft, or Publish Now to make it available.
Tip: Straight after uploading, you can also add the file from the upload window: tick the checkbox next to the file and click Insert at the top of the window. If you don’t see that option, close the window and use Browse as in steps 3 and 4. Every file you upload is listed there.
Files added this way are shared across your whole account rather than tied to one client. Once the article is published and you turn on Show For All Users, every user can open the article in read-only mode and download the linked file from there.
This gives you a practice-wide spot for blank intake forms, checklists, or other documents you want every practitioner to reach in one place, separate from a specific client’s Records > Files. See Using the Text Editor for more on uploading and reusing files, including the accepted file types and size limit.
Can I sort my Practice Manual sections or articles alphabetically?
Yes, by dragging them into that order yourself. There’s no automatic alphabetical sort, so to get A-Z order, drag your sections and articles into place with the six-dot handle: see Re-order the sections above for sections, and Re-order the articles in this section above for the articles within one.