
Creating file tags
You can add new tags to your account or edit existing ones by following the steps below.
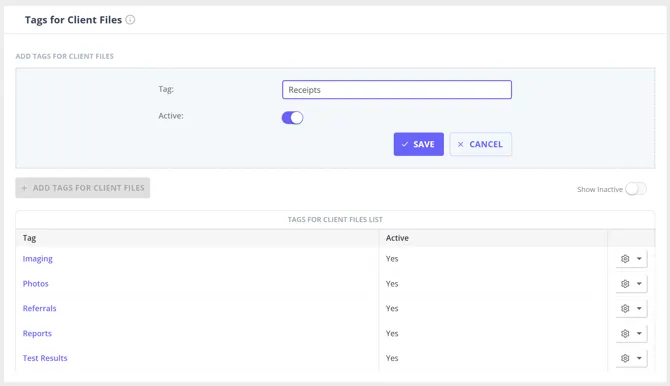
- Go to User Menu > Account Settings > Clients > Tags for Client Files
- Click + Add Tags for Client Files
- Enter a name for the tag, make sure it’s active and click ✔ Save.
Apply tags to file uploads
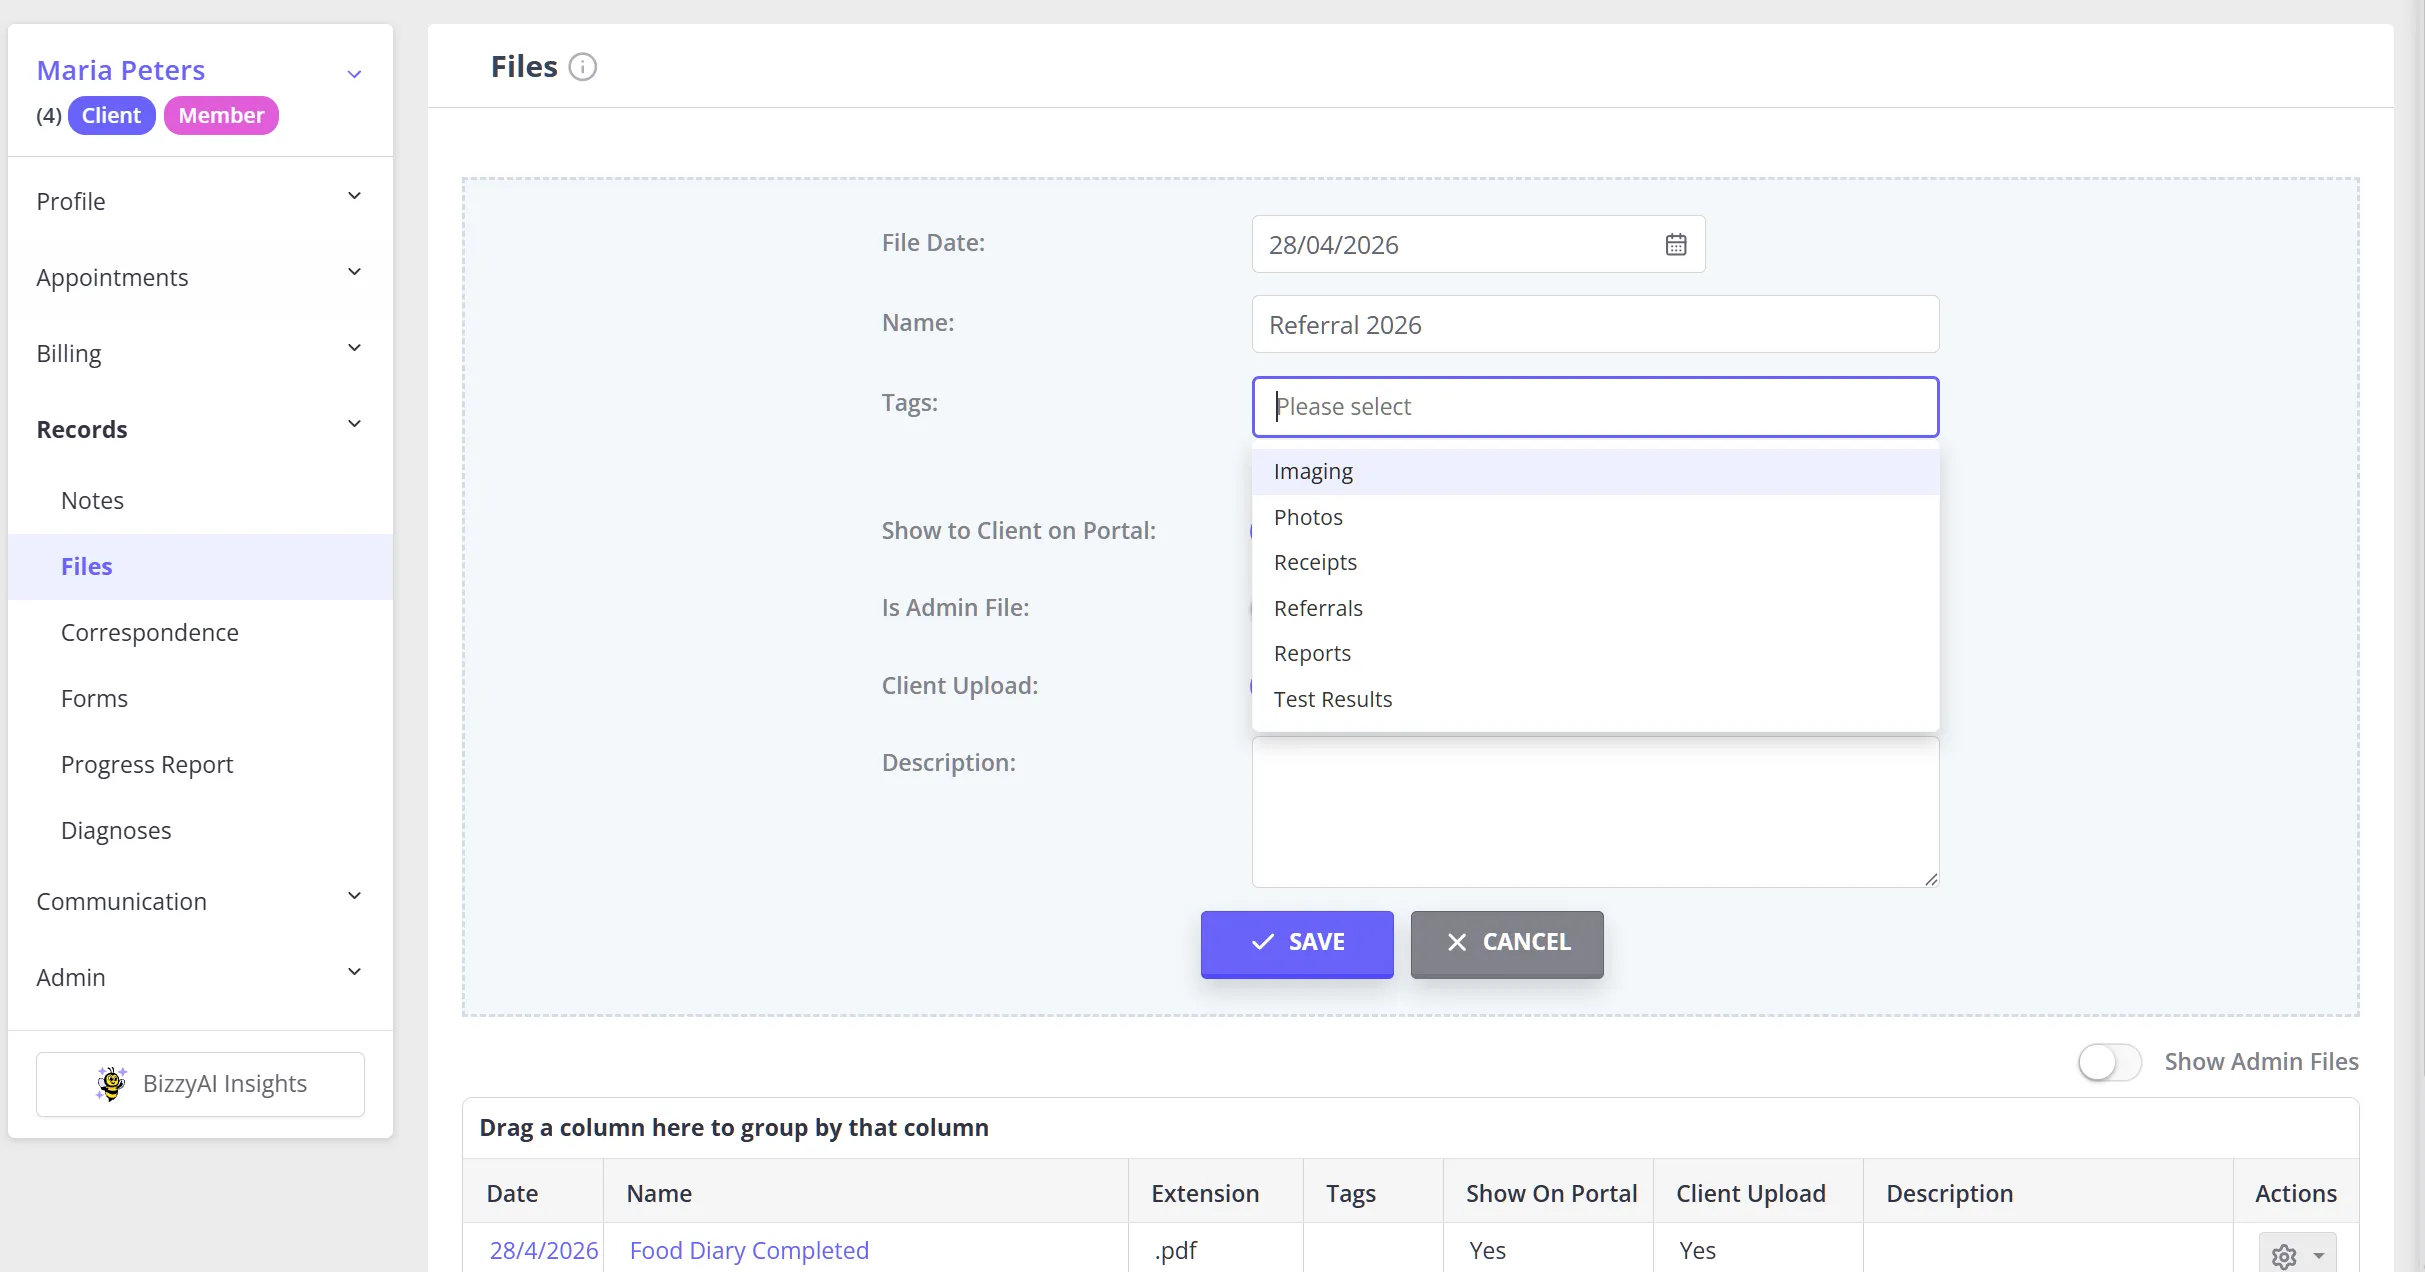
After adding tags to your account for the use you will be able to apply these when a file has been uploaded. Just click on the date of the file you want to edit, or on the Actions icon. A file can have multiple tags applied to it.
Sorting files based on tags
You can sort a client’s files area by the tag applied to each, creating a folder-like view that makes it easier to quickly find what you’re looking for.
You can also use all of the same filters and column sorting options that you can in our other reports, so if you’re looking for a certain file, or need to narrow down what you’re looking at they might help.
Reporting or filtering files by tag across all clients
File tags are a per-client tool for sorting and filtering one client’s files area. They don’t appear as a field anywhere in reports, so to pull files across multiple clients at once, use Uploaded Client Files under Tools > Data Export instead.
You can export files for all clients, for a specific practitioner’s clients, or for one client. You can also narrow the results to a date range, though this export doesn’t filter by file tag either. See Exporting Your Data for the full steps.
If cross-client filtering by file tag would help your practice, submit the idea through Submit an Idea in the Help menu. See How to Submit a Feature Request on the Customer Ideas Portal.